Decadent Chocolate Silk Pie: A Timeless Favorite
Craving the ultimate dessert? Join me in making this Bake Chocolate Pie: Decadent Classic Dessert that's rich, creamy, and perfect for gatherings!

Embrace the Decadence: Bake Chocolate Pie
Oh my gosh, let me take you back to a family gathering a few summers ago. we were sitting outside, sun shining, kids running around, and the scent of burgers on the grill filled the air.
But none of that mattered when grandma brought out her famous chocolate pie — everyone stopped in their tracks. the anticipation was real! if you’re a chocolate lover like i am, you totally know what i’m talking about.
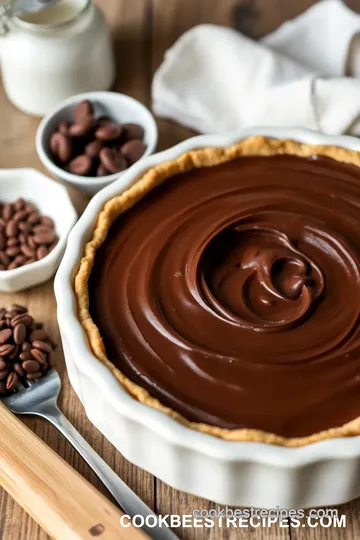
That rich, smooth filling, cold and creamy, with a touch of whipped cream on top—it’s like a loving hug for your taste buds.
You just can’t resist the urge to dive in. i'm here to share how to bake chocolate pie: decadent classic dessert , a recipe that’ll make you the star of any gathering.
A Slice of History
So where did this chocolatey delight come from? the origins of the chocolate pie recipe can be traced back to american kitchens, where home bakers were creating sumptuous desserts for family and friends.
The classic chocolate silk pie became especially popular in the mid-20th century. today, it’s still a beloved treat, making appearances at parties, holidays, and celebrations everywhere.
When it comes to baking, this pie sits comfortably in the medium difficulty zone. sure, it requires a little finesse when making that flaky pie crust and the silky chocolate filling , but trust me—it's totally worth it! you're looking at about 15 minutes of prep time, 30 minutes for chilling, and another 30 minutes of baking.
So, in just over an hour, you’ll have a stellar dessert ready to impress your guests. plus, it yields 8 generous servings , making it a fabulous choice when you're feeding a crowd.
And don’t sweat the cost—most of the ingredients won’t break the bank!
Why Bake This Pie?
Now let’s chat about the benefits, because honestly, this pie is more than just a pretty face. first off, it’s got some serious health benefits hiding in there.
Okay, okay, it’s still a dessert, but we’re using high-quality, dark chocolate that’s packed with antioxidants. moderation is key, my friends!
Not to mention, nothing beats serving a homemade chocolate pie when the occasion calls for it. birthdays, anniversaries, or even just a cozy friday night dinner, this pie is an ideal chocolate lover's dessert .
Plus, it’s not just delicious; it's downright elegant . a lovely slice topped with some light whipped cream can elevate your dessert game to new heights.
What really sets this pie apart from other rich chocolate desserts is its texture. the layers of chocolate pie create that magical contrast: a crispy, buttery crust giving way to that luscious, mouthwatering filling.
And honestly, if you're looking for easy chocolate dessert ideas, this is right up your alley!
So, ready to dive into the delicious details? let’s break down the ingredients and get this pie rolling before we all start drooling too much.
You’ll want to stick around for the step-by-step—trust me, it’s going to be an adventure!
Essential Ingredients Guide
When it comes to whipping up your favorite desserts , starting off with the right ingredients can make all the difference.
Trust me, it's like how a chef picks the freshest tomatoes for a nice marinara sauce. so, let’s dive into the essentials.
You might find this handy when you decide to bake chocolate pie: decadent classic dessert (which we’ll get to later!).
Premium Core Components
Every great recipe needs its core ingredients. Here’s a quick rundown of what to grab, complete with some ninja tips:
- All-Purpose Flour: You're gonna want about 1 ½ cups (190g) . Aim for something that feels soft but not dusty. Quality Indicator: A fine, silky texture that’s uniform in color.
- Unsalted Butter: Grab ½ cup (113g) , chilled and cubed. The key here? Freshness! Storage Guideline: Keep it in the fridge to prevent it from turning rancid.
- Granulated Sugar: This will add the sweet touch. For this pie, you need 1 cup (200g) . When it’s nice and sparkling, you know it’s fresh!
Pro tip: Always check the expiration dates on your ingredients. You don’t want to ruin your pie with something that’s past its prime!
Signature Seasoning Blend
You might think desserts are straightforward. But oh no, there’s a whole world of flavor waiting!
- Cocoa Powder: This one’s crucial. Grab ¼ cup (25g) of unsweetened cocoa powder. Flavor Enhancer: It should smell rich and delicious.
- Vanilla Extract: Just 1 teaspoon gives your filling that special something. Go for a real extract, not the imitation!
- Salt: A dash of ½ teaspoon to enhance and balance those sweet flavors.
You can mix in your favorite spices too, like a hint of espresso powder for a mocha twist.
Smart Substitutions
Running low on an ingredient? Don’t sweat it! Here are some common swaps that can save your pie from disaster:
- Flour: If you’re gluten-free, use a gluten-free all-purpose flour blend instead. It’s a lifesaver!
- Butter: Need a dairy-free option? Coconut oil works wonders.
- Cocoa Powder: If you’re low on unsweetened, Dutch-processed can help out in a pinch. Just check the amounts!
I can’t tell you how many times I’ve been bailed out by some clever substitutions. Life happens, right?
Kitchen Equipment Essentials
Now, let’s talk tools. Having the right gear can really make or break your baking experience.
- 9-inch Pie Dish: This is a must. No one wants a pie overflowing onto the oven!
- Mixing Bowls: Size up your game with a couple of good bowls. You’ll need them!
- Whisk or Electric Mixer: Speed things up while whipping cream for that luscious topping.
- Rolling Pin: Essential for your flaky pie crust.
- Rubber Spatula: Perfect for folding in that chocolate filling without any mess.
If you're just starting out, a few solid basics are way better than a full arsenal of fancy gadgets. Trust me, less is often more!
Wrapping It Up
With your ingredients sorted and your tools in place, you're ready to transform those essential components into something divine. i’ve had my share of baking disasters, but every time i get it right, there’s just no feeling like it.
You’ll impress family and friends alike!
So, maybe you're itching to dive into that Chocolate Pie recipe now? Rich and lingering flavors, silky chocolate filling… it’s a chocolate lover's dessert dream! Stick around for the next section where we'll walk through how to whip up that luscious Decadent Chocolate Silk Pie that’s perfect for gatherings, celebrations, or just because it's a Tuesday! Let's make that rich and delectable chocolate pie a reality!
Professional Cooking Method: Master Your Kitchen Skills
Let’s chat about the science and art of cooking, shall we? ever wondered how professional chefs make everything look and taste so darn good? spoiler alert: it’s not magic.
It's all about the method! today, we're diving into the professional cooking method to help you create that bake chocolate pie: decadent classic dessert and knock your friends' socks off.
Essential Preparation Steps
First things first. mise en place ! this fancy french term just means “everything in its place.” before diving into your pie game, gather all your ingredients and tools.
Having everything set up saves time and prevents that chaotic kitchen vibe we all know too well. trust me, it’s a total lifesaver!
Now, let’s talk time management . make a plan and stick to it. for our chocolate pie, you’re looking at about 15 minutes of prep and 30 minutes chilling, plus 30 minutes cook time.
Just think—within an hour and a half, you can have a stunning dessert ready to go. set a timer, and do one task at a time to keep things flowing smoothly.
Don’t forget organization strategies ! clear off your counters, use bowls for ingredients, and keep your tools handy. you'll feel more like a pro! and, oh my gosh, let’s chat safety—make sure you have oven mitts for hot pans and keep raw eggs away from your fruits.
No one wants a salmonella scare during dessert time!
Step-by-Step Process
Here’s where the magic happens! Let’s break it down, step by step, so it’s easy to follow.
-
Make your pie crust : combine 1 ½ cups flour with ½ teaspoon salt . cut in ½ cup cubed, chilled butter until it looks like coarse crumbs.
Add 3-4 tablespoons of cold water gradually. wrap it up and chill for 30 minutes .
-
Prepare the chocolate filling : in a saucepan, whisk together 1 cup sugar , ¼ cup cocoa powder , and 3 large eggs .
Gradually add ½ cup milk . cook this mixture over medium heat until it thickens—around 10 minutes , stirring often. when done, melt in 6 ounces chocolate and ½ cup butter .
Toss in your 1 teaspoon vanilla , and bam! oh, the smell—like heaven!
-
Bake the crust : preheat your oven to 350° f ( 175° c) . roll out your dough and fit it into your pie dish.
Bake for 20- 25 minutes until golden brown. let that beauty cool, then add your chocolate filling.
-
Chill : Let your pie sit in the fridge for at least 2 hours to set up perfectly. Pro tip : the longer it chills, the better it'll taste.
-
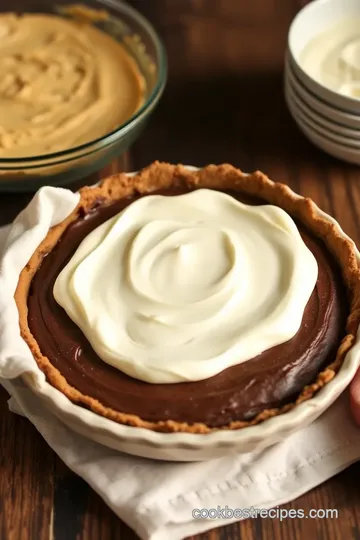
Topping time : Whip 1 cup heavy cream with 2 tablespoons sugar and 1 teaspoon vanilla until soft peaks form. Spread it over your cool pie. Feeling fancy? Garnish with chocolate shavings!
Expert Techniques
Want to impress? Here are some expert techniques! When making that flaky pie crust , ensure your butter is cold. This makes for a perfect texture.
Quality checkpoints are critical too. Taste as you go! Always check your chocolate filling for sweetness. Not sweet enough? A touch more sugar can work wonders.
When trouble arises, like a soggy crust, make sure to cook the filling well. You might also try blind baking if you want extra security against sogginess.
Success Strategies
Now, let’s avoid rookie mistakes. remember, the biggest no-no is overmixing the crust dough. it’ll lead to tough pie crust—yikes! and don’t skip the chilling process.
It makes all the difference in presentation and taste.
Quality assurance is key! If you're worried about how to make a pie, practice and taste your filling before it sets. It’s all about that rich chocolate flavor, you know?
Want to make it ahead? this pie is perfect for freezing! just cover it tightly with plastic wrap to avoid freezer burn.
It’ll stay good for a couple of weeks, and all you need to do is thaw before serving. now that’s a game changer!
As we wrap things up, know that Bake Chocolate Pie: Decadent Classic Dessert is just the beginning. With these pro tactics, you can dive into other chocolate dessert variations or even tackle gourmet recipes! Ready for more? Let’s move on to some Additional Information that’ll keep your kitchen skills on point!
Delicious Details About Your Bake Chocolate Pie: Decadent Classic Dessert
Baking is like a superpower, but every superhero needs a few secret tricks up their sleeve, right? If you're diving into the world of pie baking with your Bake Chocolate Pie: Decadent Classic Dessert , I've got some pro tips and secrets that’ll help you whip up a showstopper every time!
Pro Tips & Secrets
First off, let’s talk about timing . while the prep seems easy peasy, don’t rush that chilling time! allowing your pie to chill for at least two hours is key—not just so it's cool, but to let those flavors mingle.
And if you’re feeling a bit harried, try making the crust ahead of time. you can whip it up a day early and stash it in the fridge.
Now, let's enhance those flavors! ever thought of adding a pinch of espresso powder ? just a bit will deepen that chocolatey goodness without tasting like coffee.
And trust me, nobody's gonna say, “oh, this pie has coffee in it!” they’ll just think it’s the best chocolate filling recipe they’ve ever tasted.
Presentation is everything, my friend. for an elegant touch, a dusting of cocoa powder or chocolate shavings on top of your whipped cream can elevate it from “meh” to “wow.
” and remember, don’t just slap that cream on top—try to spread it smoothly for that pinterest-ready look.
Perfect Presentation
You want your homemade chocolate pie to look as good as it tastes, right? when it comes to plating techniques , a simple slice served on a fancy plate can do wonders.
Layer that whipped cream topping high and don’t be shy with those chocolate shavings!
Think about your color combinations too. a sprinkle of fresh raspberries on the side can add a burst of color and a hit of tartness that complements the rich flavors in this classic chocolate silk pie .
The contrast makes your dessert irresistible!
Storage & Make-Ahead Tips
If you find yourself with leftovers (but who are we kidding, that rarely happens!), make sure to store your pie right.
Cover it with plastic wrap or pop it in an airtight container if you want to keep it fresh for up to three days .
But don’t expect it to last much longer—this pie is pure chocolate lover's dessert magic!
If you plan to bake ahead for a gathering, you can prep the filling a day before. just keep the pie crust separate and bake it on the day of serving.
That way, you'll end up with fewer last-minute tasks.
Creative Variations
Feeling adventurous? this pie is a canvas for creativity ! you can switch up the flavor adaptations easily. maybe toss in some peanut butter or caramel for a luscious twist.
And if you want to go seasonal, grab some pumpkin or add a touch of peppermint extract during the holidays for a festive flair.
For you gluten-free folks, swap regular flour with a gluten-free all-purpose blend in that flaky pie crust recipe . See? No one has to miss out on this deliciousness!
Complete Nutrition Guide
Now let’s get down to the nitty-gritty. enjoying dessert doesn’t have to come with guilt. each slice of this pie packs about 360 calories , which isn’t too shabby for a decadent treat.
It’s rich in flavor and serves as a delightful splurge that satisfies without going overboard.
But do remember, portion control is key! Giving yourself a slice and enjoying it without guilt can make dessert feel even sweeter.
Expert FAQ Solutions
On that note, let’s tackle some common questions . “why did my pie fill not set?” well, it might not have cooled long enough or you cooked it too fast.
When it comes to baking tips for pie , patience is everything!
Another hot tip—if your chocolate pie variations turn out too runny, try blending an extra tablespoon of cornstarch into your filling next time.
Conclusion
So there you have it! you’re now equipped with everything needed to bake chocolate pie: decadent classic dessert that’s charmingly simple yet utterly sophisticated.
With these tips, you’ll not only be able to bake a pie that wows your friends, but you’ll also feel like a culinary rock star! remember, baking is all about having fun, experimenting, and making mistakes – the best part is, there's always whipped cream to save the day! happy baking!

Decadent Chocolate Silk Pie: A Timeless Favorite Card

⚖️ Ingredients:
- 1 ½ cups (190g) all-purpose flour
- ½ teaspoon salt
- ½ cup (113g) unsalted butter, chilled and cubed
- 3-4 tablespoons cold water
- 1 cup (200g) granulated sugar
- ¼ cup (25g) unsweetened cocoa powder
- 3 large eggs
- 1 teaspoon vanilla extract
- ½ cup (120ml) whole milk
- 6 ounces (170g) semisweet chocolate, chopped
- ½ cup (113g) unsalted butter
- 1 cup (240ml) heavy cream
- 2 tablespoons confectioners
- sugar
- 1 teaspoon vanilla extract
🥄 Instructions:
- Step 1: Combine flour and salt in a bowl.
- Step 2: Cut in chilled butter until mixture resembles coarse crumbs.
- Step 3: Stir in cold water, one tablespoon at a time, until dough forms.
- Step 4: Flatten into a disk, wrap in plastic, and chill for 30 minutes.
- Step 5: In a medium saucepan, whisk together sugar, cocoa, and eggs until smooth.
- Step 6: Gradually add milk, then cook over medium heat until thickened, stirring frequently.
- Step 7: Remove from heat and stir in chopped chocolate and butter until fully melted and smooth.
- Step 8: Add vanilla extract and mix well.
- Step 9: Preheat oven to 350°F (175°C).
- Step 10: Roll out chilled dough on a floured surface and fit into the pie dish.
- Step 11: Bake for 20-25 minutes until golden brown; let cool.
- Step 12: Pour the chocolate filling into the cooled crust and smooth the top.
- Step 13: Chill in the refrigerator for at least 2 hours until set.
- Step 14: Whip heavy cream, sugar, and vanilla until soft peaks form.
- Step 15: Spread whipped cream over the cooled chocolate filling.
- Step 16: Slice and serve chilled or at room temperature.
Previous Recipe: Easy Bake Rolo Pretzel Turtles | Sweet & Salty Deliciousness
Next Recipe: How to Make Frying Cauliflower Crispy Delightful Bites: The Ultimate Snack!